Create a Custom Widget
Here you'll learn how to create your custom widget project.
IMPORTANT
Before creating your custom widget make sure you have installed all of the prerequisities.
Custom Widget Project
BeWidgets - Widget Template extension contains the Widget Template project for easy widget development.
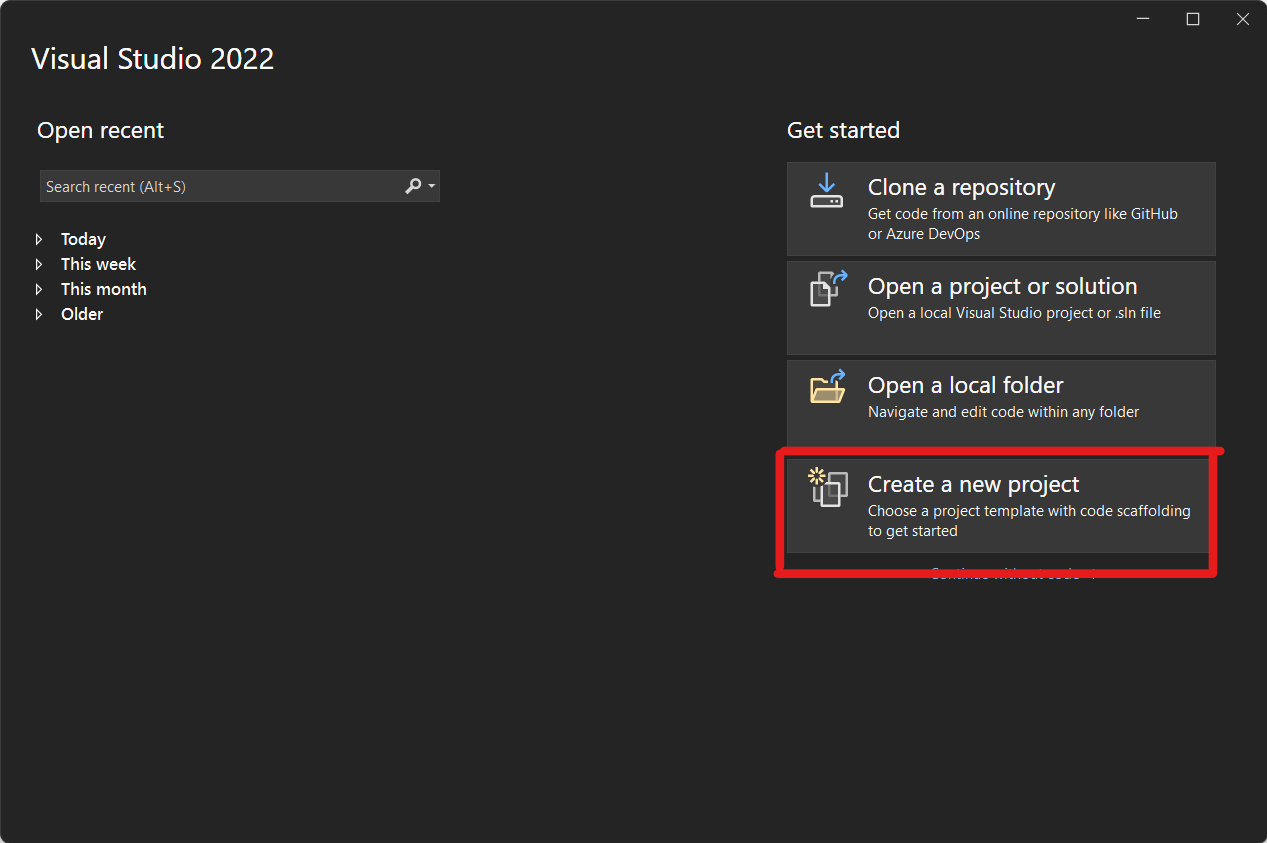
- Open Visual Studio.
- Click Create a new project.
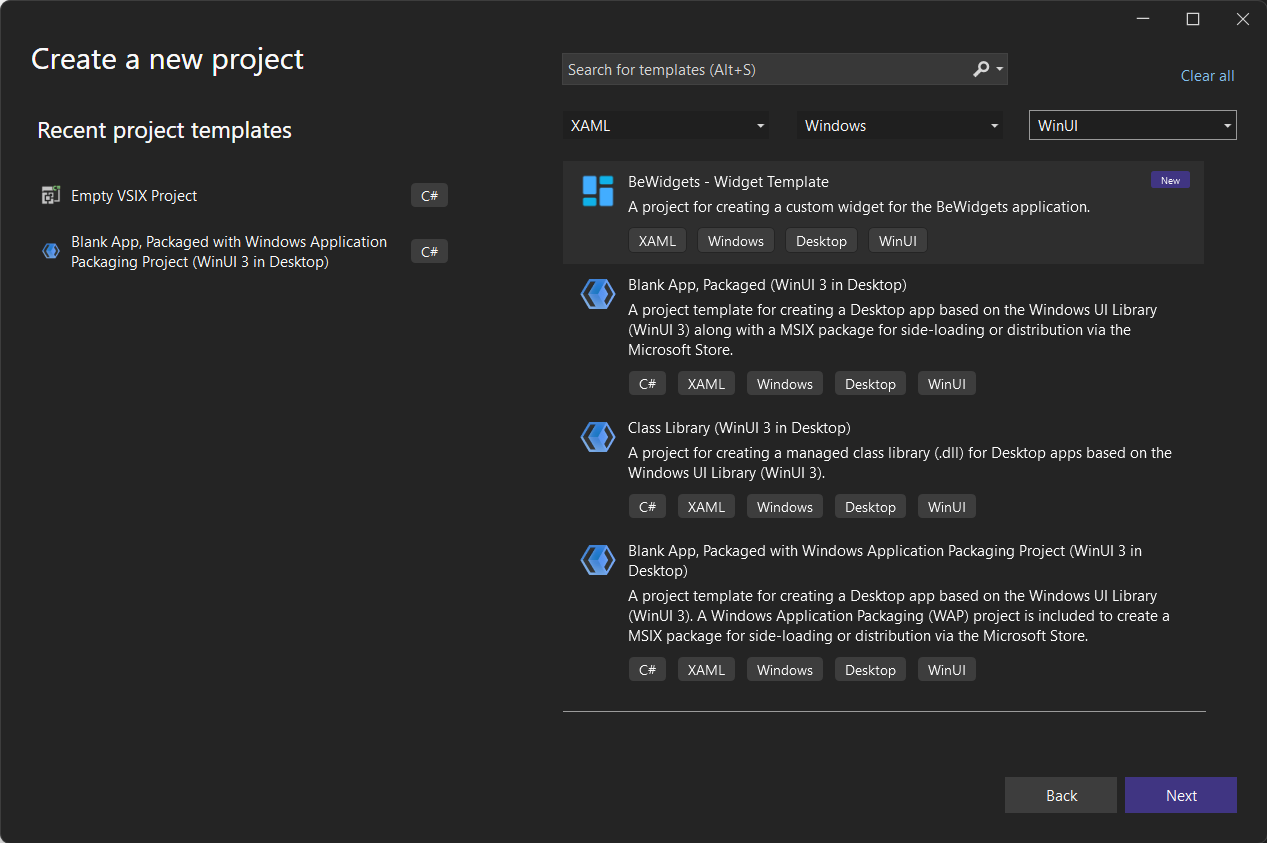
- In the New Project dialog's drop-down filters, select C#/C++, Windows, and WinUI.
- Select the BeWidgets - Widget Template and click Next.
Enter a project name (For this tutorial we'll use MyCustomWidget), choose any other options as desired and click Create.
The generated project is your custom widget. The App.xaml and App.cs files contain the WidgetApplication class which is used for running your custom widget. Views folder contains pages for your widget, you'll learn more about them later.
Now we need to update our packages. Right click your project and click the Manage NuGet Packages... option. Update all packages in the Update tab.
IMPORTANT
You'll probably see a lot of errors. These erros are not important because running the project in Unpackaged mode will fix them. This is because Visual Studio doesn't have the needed files that are only available after building your project.
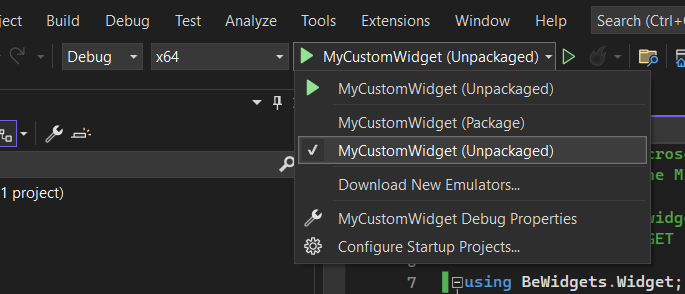
- Run the widget in the Debug configuration with the Unpackaged startup option to confirm that the widget runs without errors.
IMPORTANT
Running the project with the Unpackaged startup option is MANDATORY, otherwise your widget could run incorrectly!
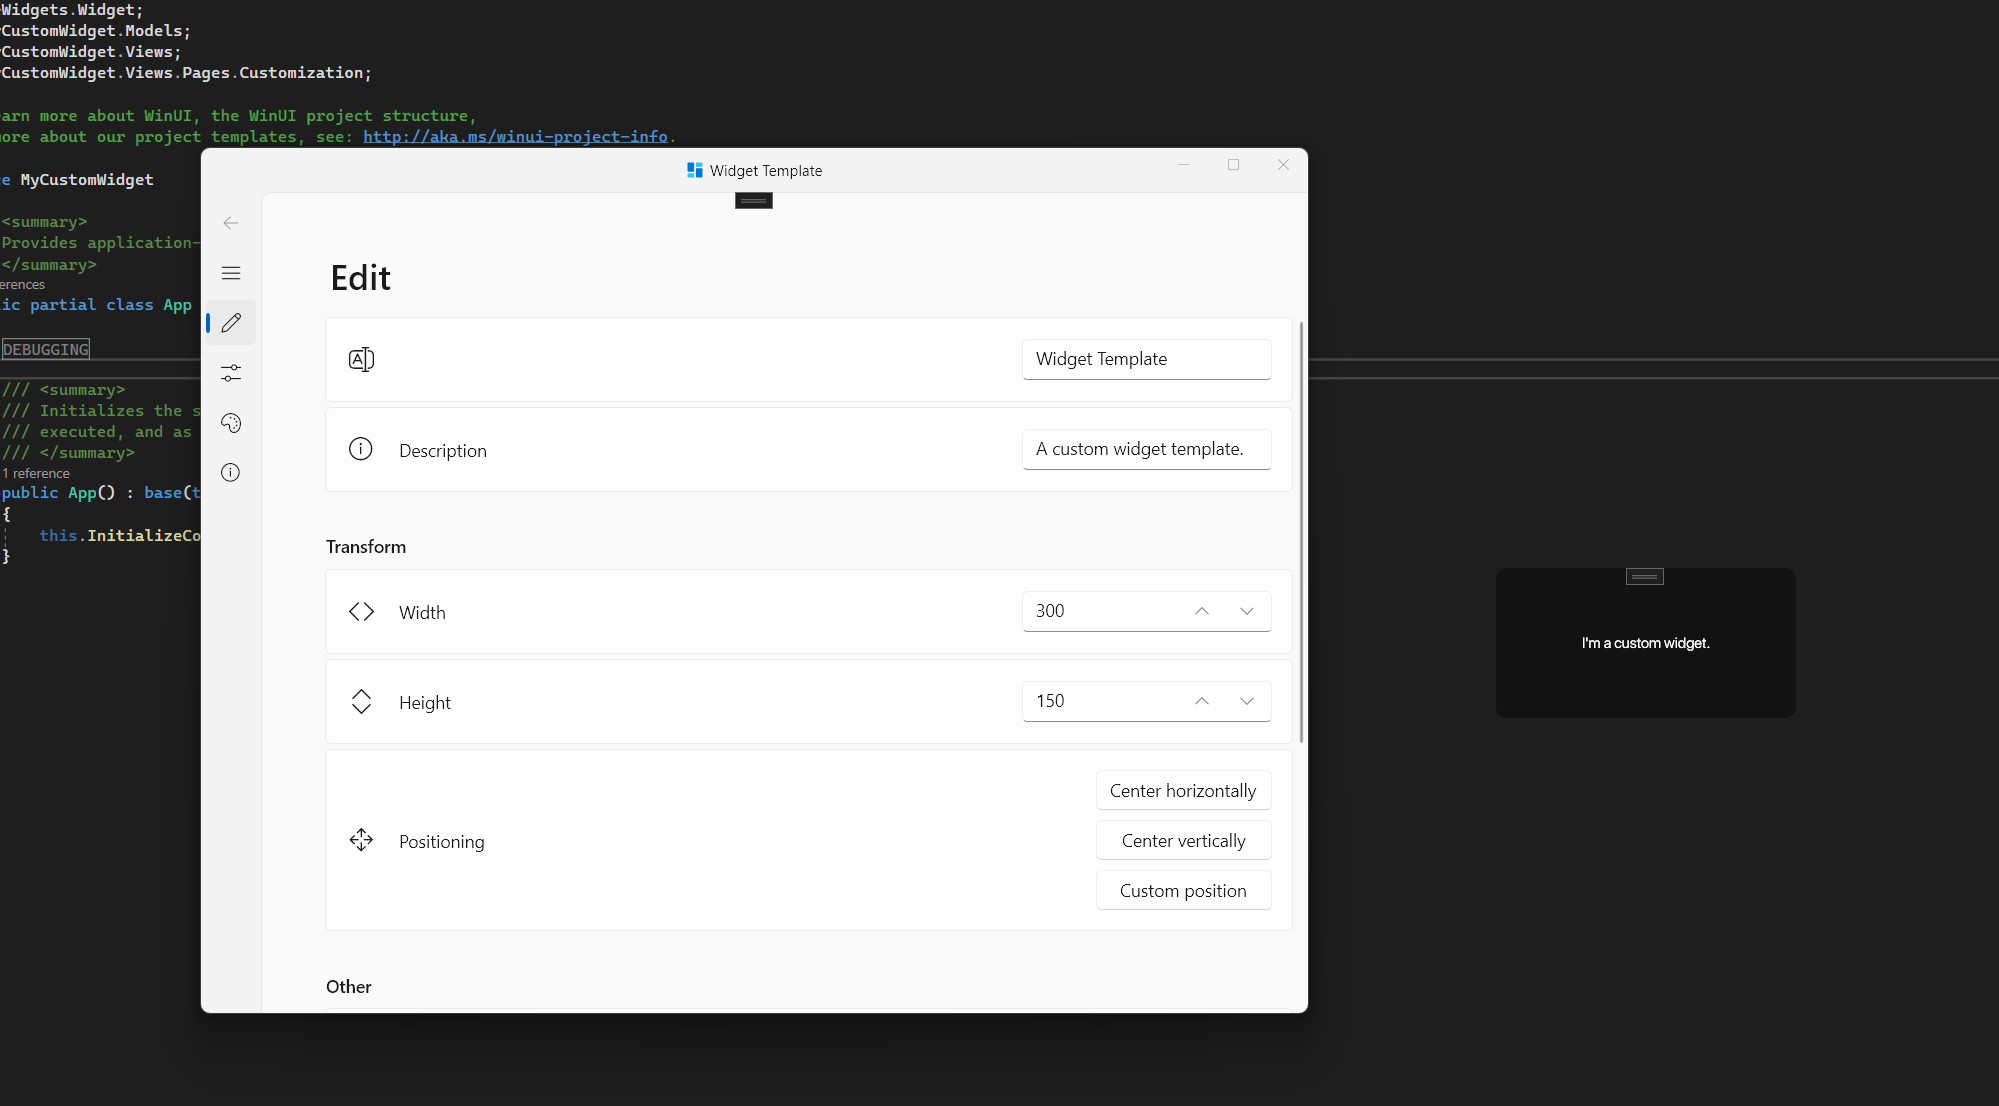
- You should see something like this: